
We’re already two weeks into this year’s series of Bake Off and we’ve already had 3 Hollywood handshakes! This week was Cake Week which saw the first time that spinach made an appearance in a cake in the tent in the form of Prue’s Le Gateau Vert technical challenge as well as spectacular chocolate collar cakes for the showstopper. This week I’m taking on the signature challenge which was a traybake!
I took inspiration from Rahul’s amazing Lemon Traybake with Lemon and Cardamom Drizzle and the Gateau Vert technical for my traybake; I wanted to do a layered traybake like Rahul’s as well as do a nut-based genoise sponge. I took further inspiration from a hazelnut coffee drink that I had while I was in Hong Kong and thus, I created my Hazelnut and Coffee Traybake.
The sponge in my traybake is a hazelnut genoise sponge. The technique for a genoise sponge is to whisk the eggs and sugar until it reaches ribbon stage. This means that you can lift the whisk out of the mixture and draw a figure of eight that sinks back into the mixture 2 or 3 seconds later. Traditionally you would whisk this over a pot of boiling water but an electric whisk aerates the eggs enough. After sifting in the dry ingredients, you need to add melted butter, which makes it different from a normal whisked sponge like the one used for a Swiss roll. Traditionally this is brown butter, which has a nuttier flavour and aroma.

While you may instinctively just pour it into the batter, you risk losing so much of the air you worked so hard to build and keep. The big difference in consistencies of the batter and the butter make it hard to incorporate the melted fat without overworking the gluten in the flour and losing the lightness built up in the whisking stage. Hence it is better to mix the melted fat into a small amount of the cake batter and fold this back in. The batters are more similar in consistency so it’s much easier (and therefore quicker) to incorporate.

Ideally you want to make this sponge ahead of time. With such a light and fluffy texture, slicing the cake fresh will make it hard to cut clean edges. However if this isn’t a huge concern of yours, then you can make and construct the sponge on the same day. Otherwise wrap the cake in clingfilm and leave at room temperature.
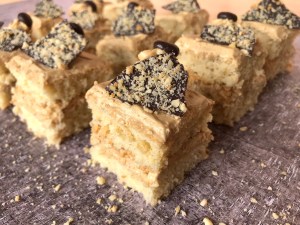
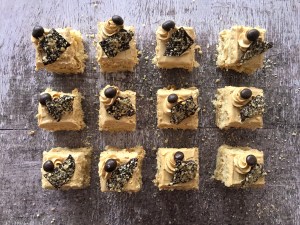
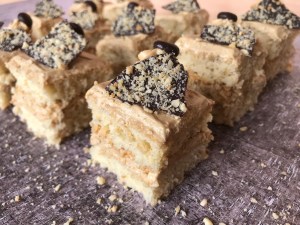
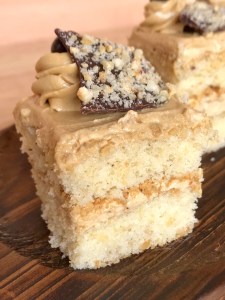
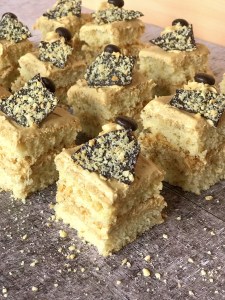
I like to finish off the cake squares with a swirl of the coffee buttercream, a chocolate covered coffee bean and a piece of dark chocolate hazelnut bark. These two little finishing touches add a touch of luxury as well as a contrast of colour and flavour as well as cutting through the sweetness of the coffee buttercream and hazelnut genoise.
For the hazelnut genoise sponge:
4 eggs
145g granulated sugar
100g plain flour
90g ground toasted hazelnuts (see below)
45g margarine, melted and cooled
For the coffee buttercream:
115g margarine
240g icing sugar, sifted
1 tbsp instant coffee granules dissolved in 1 tbsp milk
For the decoration:
50g dark chocolate
30g ground toasted hazelnuts (see below)
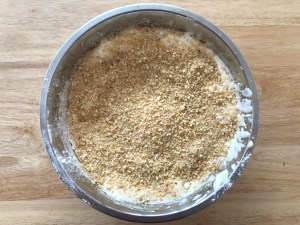
To make the ground toasted hazelnuts, place 150g of whole hazelnuts into a baking tin (any size tin will do as long as it’s in one layer) and place into a 180°C oven for about 12 – 15 minutes until the nuts have a toasty aroma. Leave to cool slightly and rub the nuts together in a clean tea towel or in some parchment until the skins come off. Don’t worry about any that don’t come off from simply rubbing. Place into a food processor and blitz until you have a mix of fine powder, fine chunks and small pieces – see my pictures for a visualisation!
Preheat the oven to 160°C. Line two 20cm square baking tins with 2 strips of parchment instead of a large sheet. This gives cleaner edges on the sponge.
For the hazelnut genoise, whisk the eggs and sugar using a hand whisk on a medium high speed for around 5 minutes until it reaches ribbon stage. This means that you can lift the whisk out of the mixture and draw a figure of eight that sinks back into the mixture 2 or 3 seconds later.
Sift the flour evenly over the surface of the bowl and sprinkle the ground hazelnuts evenly over the surface. Fold the dry ingredients in until it is just incorporated, scraping around the edge of the bowl and cutting through the centre, making sure all the flour is mixed in (it has a tendency to clump at the bottom).
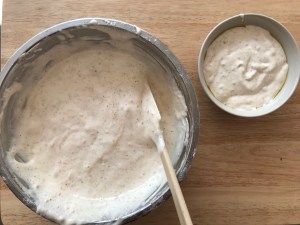
Pour some of the batter into the bowl of melted margarine. Beat to combine the mixture and then pour back into the large bowl and fold to incorporate. Divide the batter between the two baking tins and tilt the tin to level out the cake batter.
Bake the hazelnut genoise sponges for around 15 – 18 minutes until the cake is golden brown, fragrant and springs back when touched lightly. Lift the cakes out from the tin after 10 minutes and cool on a wire rack until cooled completely.

I actually like to make the buttercream by hand! For the coffee buttercream, cream the margarine until it is light and fluffy. Add in the icing sugar in two stages, beating well in between each addition. Then add the dissolved coffee mixture and beat the buttercream for around 2 minutes until it is light, smooth and has a spreadable consistency, not too thick and not too wet.
For the dark chocolate hazelnut bark, melt the dark chocolate in the microwave in 30 second intervals until just melted, stirring between each one. Spread the chocolate thinly onto a sheet of parchment and sprinkle the surface with some of the toasted hazelnuts. Refrigerate until set and then break up into small shards, keeping them in the fridge until needed.
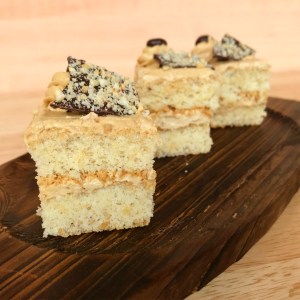
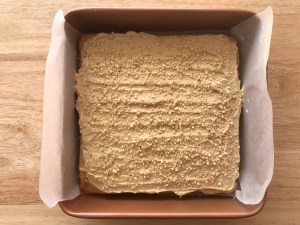
Place one of the genoise sponge layers, top side up, into a 20cm baking tin lined with 1 strip of parchment. Take about two-fifths of the coffee buttercream and using an offset spatula, spread the buttercream evenly on the sponge. Sprinkle with a layer of the ground toasted hazelnuts.
Place the second genoise sponge on top, bottom side up, and spread another two-fifths of the buttercream evenly. Transfer the remaining buttercream into a piping bag fitted with a small star nozzle and refrigerate everything for 15 minutes.
Use a sharp serrated knife to trim the edges neatly. Divide the cake into 16 even squares, cleaning the knife between each cut to help with clean edges (although you don’t have to if the uniformity doesn’t concern you). Pipe a small rosette of the buttercream on one corner of the top of the cake squares, place a chocolate covered coffee bean on top and lay a piece of the chocolate bark at an angle on the top.
Follow me on Facebook, Twitter and Instagram, subscribe to my YouTube channel and make sure to check out my other recipe posts inspired by Bake Off’s challenges this year:
- Biscuit Week: Homemade Wagon Wheels (without gelatine!)
- Bread Week: Flapjack Chelsea Buns
- Dessert Week: White Chocolate and Black Sesame Blancmange
- Spice Week: Upside Down Apple Gingerbread Loaf Cake
- Pastry Week: Pork and Vegetable Samosas with Creamy Cucumber Dip
- Vegan Week: Vegan Chocolate Praline Layer Cake
- Danish Week: Kimchi and Vegetarian Smørrebrød
- Patisserie Week: Mini Matcha Cakes
- Finals Week: Homemade Garlic Pitta-style Flatbreads
Also if you have enjoyed my recipes and my content, consider supporting me on Patreon; there you can find more information about Patreon, how you can support me and the blog and the perks that come along with that. Check out my Patron Appreciation Page while you’re down here too!


These look gorgeous! Impressed that you made genoise though, watching them do it on Bake Off puts me off completely 😂. Great post!
LikeLike
Thanks so much Jen!! Genoise isn’t as hard as they make it out to be on the show, it’s one of my favourite sponges to bake as it’s so light, even though I use plain flour like the traditional recipe does ☺️
LikeLiked by 1 person