
Scones were one of the first things I learned to bake at school and they’ve continued to be one of the recipes I enjoy the most. With scones, there tends to be little variation on how to make scones, barring savoury vs sweet and changing up the fillings but after watching a Cooking Tree video on YouTube, I became inspired to make scones in a new way. These are my Chocolate Orange Flaky Scones!

Cooking Tree has fast become one of the YouTube channels that most inspires me. It is a South Korean ASMR cooking channel which focuses on baking/dessert making. The bakes are always fantastic and I’ve had a lot of success with their recipes. When I came across the chocolate scone recipe, I was fascinated at the idea of scones that were laminated with chocolate. It makes a big difference to the humble scone and allows for a lot of creative avenues. Check out the video that I have been inspired by below:
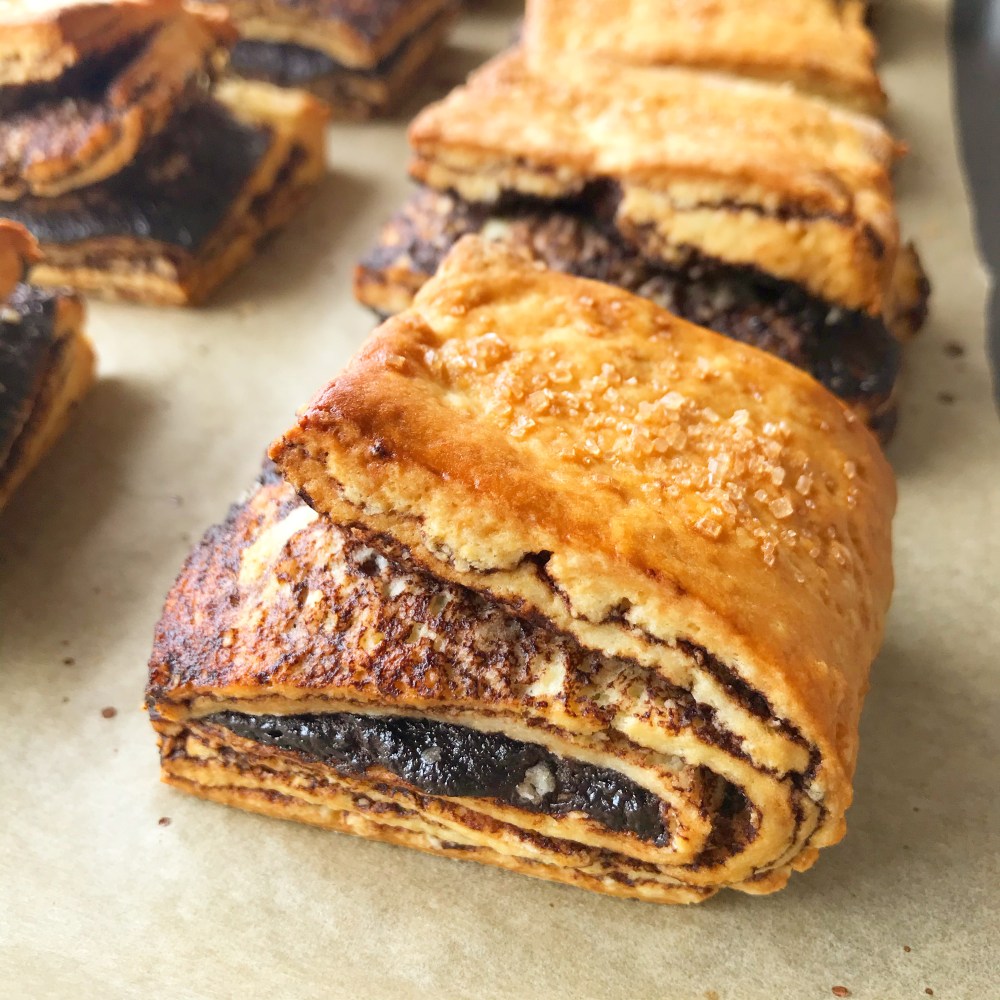
These scones are made in a classic fashion, the butter is rubbed into the dry ingredients and liquid added to combine. The dough is flattened out and chocolate is spread on the dough and folded, almost like making puff pastry and the chocolate is layered throughout the scone. Obviously when this bakes, it rises and has layers just like puff pastry but still remains super light and delicate.
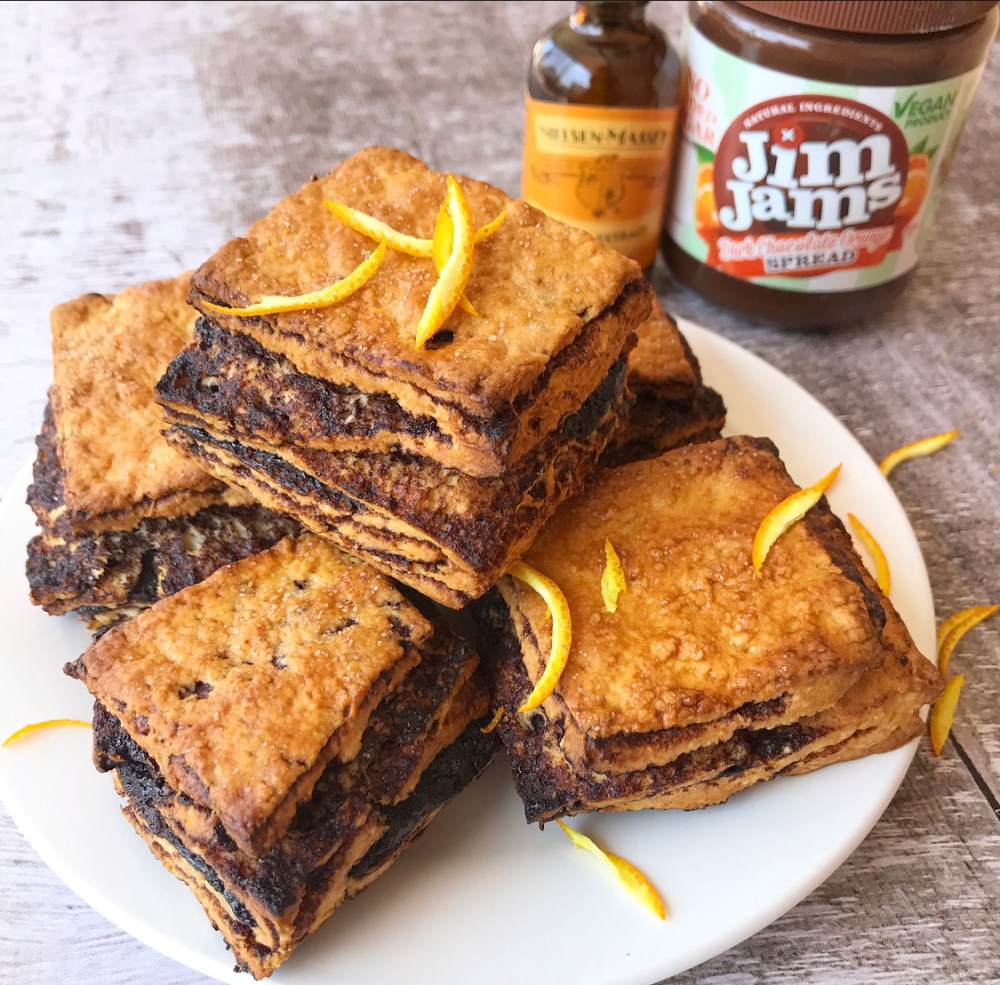
I make a slight change to the recipe in the video by using a vegan dark chocolate orange spread and adding orange extract to boost the orange flavour. If you were to use a vegan butter/spread and a non-dairy milk such as almond or soy, then these scones would be vegan as egg is not used as a liquid in this recipe.
- 250g plain flour
- 10g baking powder
- 25g golden caster sugar, plus extra for dusting
- A pinch of salt
- 100g cold unsalted butter, or margarine or any other vegan spread
- About 100ml cold milk, or any non-dairy milk, plus extra for brushing on the scones
- 1/2 tsp orange extract
- About 100g vegan dark chocolate orange spread, warmed in the microwave to soften
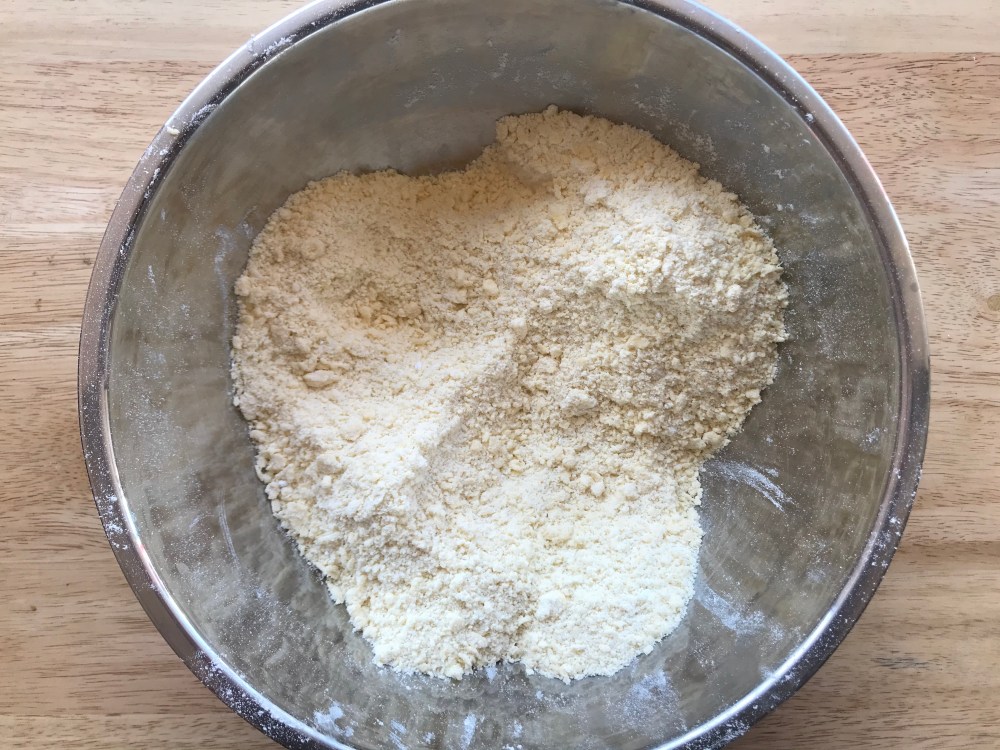
In a mixing bowl, place all of the dry ingredients, the flour, the baking powder, the sugar and the salt and mix together to combine. Add in the cold butter or margarine in small chunks. Toss to coat them in the flour and use your fingers to rub together the fat with the dry ingredients until the mixture resembles breadcrumbs.

Make a well in the centre and add in the cold milk and orange extract. Use a palette knife or a spatula to bring everything together into a rough shaggy dough. Don’t expect the dough to come together into a single ball, it should hold together in large clumps and come together when pressed.
Tip out onto a lightly floured surface and press the dough together into a solid slab. Use a rolling pin to flatten out the dough into a rectangle that is 1cm thick. Spread about a third of the chocolate spread onto one half of the scone dough and fold the other half on top. Pinch the folded edges to seal the dough and stop the spread leaking out.
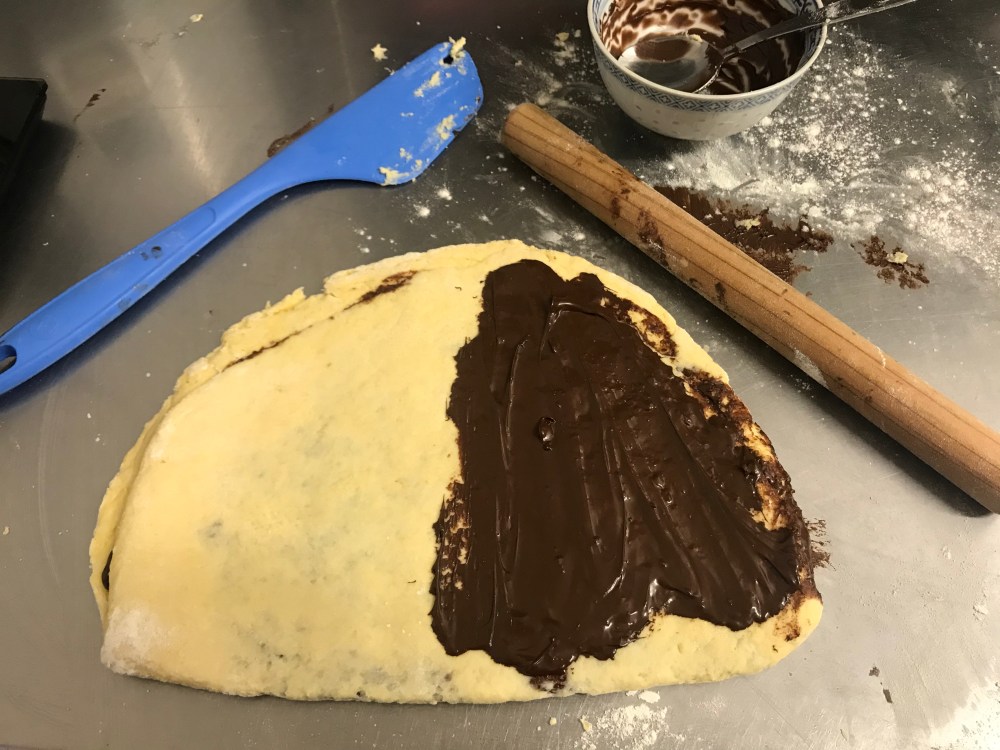
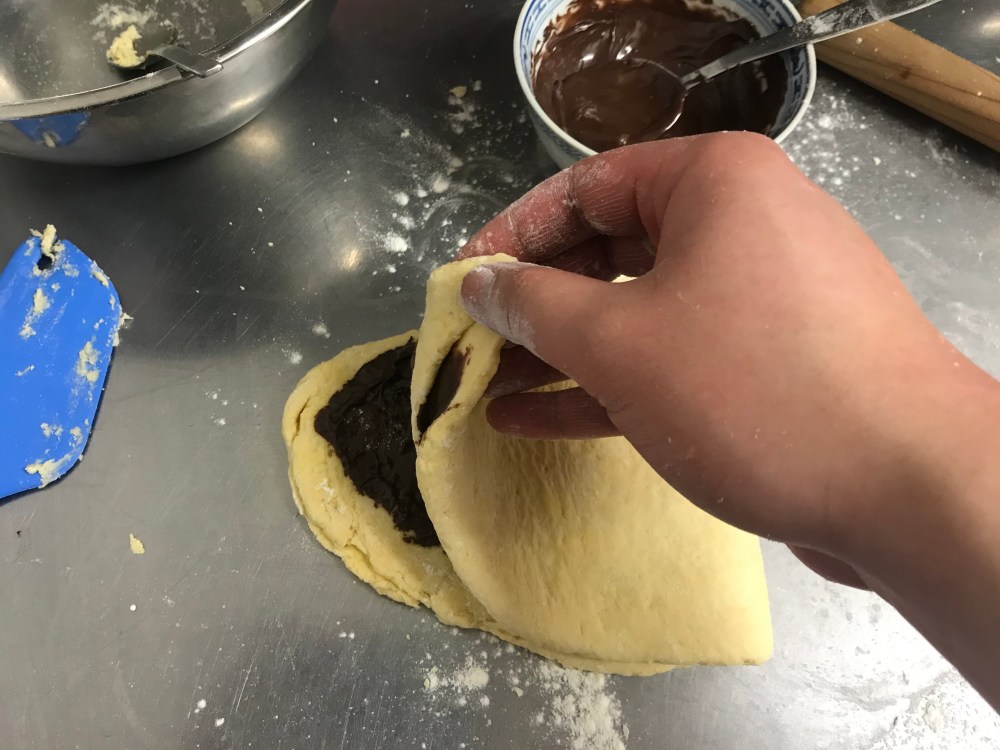
Rotate the dough 90 degrees and using a pressing motion with the rolling pin, repeat the process above two more times. Once the third layer of spread has been put on, fold over the top, seal the edges and then flatten the scone out to 2cm high, trying your best to keep the dough as rectangular as possible. Wrap the dough in clingfilm and place on a tray in the freezer for about 1 hour until the scone dough has hardened.
Preheat the oven to 190˚C. Line a baking tray with some baking parchment.
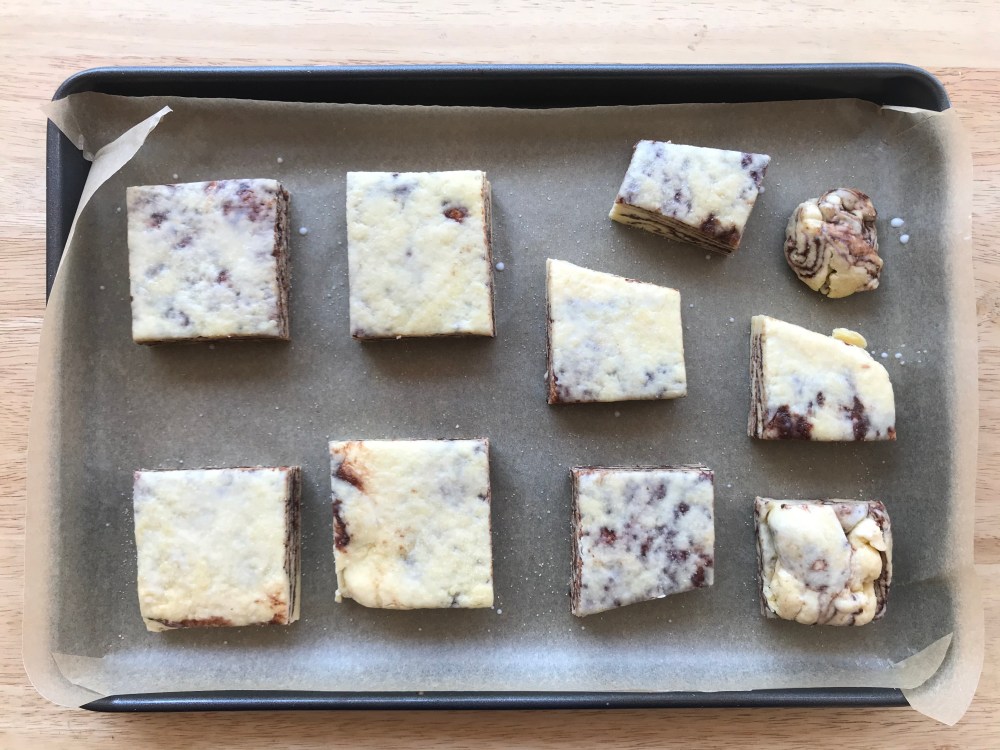
Take the scone dough out of the freezer and trim off the edges to expose the layers and get clean edges. Cut the scone dough into large squares measuring 2 inches where possible – ideally you can get 8. If your dough is not perfectly shaped, smaller pieces can be get like I did!

Brush the surfaces of the scone with milk, being careful not to get any down the sides. Sprinkle the surface with some more sugar and then bake the scones for around 18 to 20 minutes or until the scones are well risen, the surface and edges have turned a rich golden brown and the bases have browned. Leave the scones to cool on the tray for 10 minutes before moving to a wire rack to cool.
The scones can be kept in an airtight container for up to 4 days. These scones are great alongside a hot drink, topped with clotted cream or just good on their own for a snack, treat or a luxurious breakfast!
Follow me on Facebook, Twitter and Instagram, subscribe to my YouTube channel and make sure to check out my most recent recipe for my Perfect Oatmeal and Raisin Cookies!
Also if you have enjoyed my recipes and my content, consider supporting me on Patreon; there you can find more information about Patreon, how you can support me and the blog and the perks that come along with that. Check out my Patron Appreciation Page while you’re down here too!

